

Basics of Composting
What is Composting?
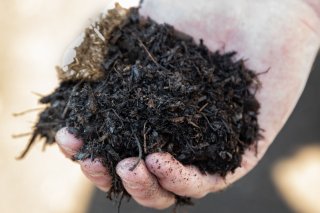
Composting is a controlled, aerobic (oxygen-required) process that converts organic materials into a nutrient-rich soil amendment or mulch through natural decomposition. The end product is compost – a dark, crumbly, earthy-smelling material. Microorganisms feed on the materials added to the compost pile during the composting process. They use carbon and nitrogen to grow and reproduce, water to digest materials, and oxygen to breathe.
You can compost at home using food scraps from your kitchen and dry leaves and woody material from your yard.
Why Compost at Home?
Additional Resources
If you are a community looking to support your constituents in their efforts to compost at home, or wish to increase participation in a curbside collection program, you may be interested in the following resource: Composting Food Scraps in Your Community: A Social Marketing Toolkit.
Composting is nature’s way of recycling. It is one of the most powerful actions we can take to reduce our trash, address climate change, and build healthy soil. By turning our food scraps and yard trim into compost, we can transform our waste streams into a beneficial, value-added soil amendment and use it to protect the environment and create resilient communities.
- Composting is a resourceful way to recycle the food scraps and yard trim you generate at home all year and manage your waste more sustainably.
- You reduce the volume of materials that might otherwise be disposed in landfills or trash incinerators – leaves, grass clippings, yard trim, and food scraps – and prevent powerful greenhouse gases from being emitted into the atmosphere.
- Composting involves minimal effort, equipment, expense, and expertise, and can be fun.
- You save money by producing a free, high quality soil amendment – compost, which reduces your use of fertilizer and pesticides.
- You can use your compost to build healthier soil, prevent soil erosion, conserve water, and improve plant growth in your garden and yard.
Options for Composting at Home
There are different ways to compost at home:
- Backyard composting with a pile or a bin you can build yourself or purchase.
- Vermicomposting (worm composting) with a bin.
If you don’t have an outside space for composting, consider participating in a local community-based composting program, which may collect your food scraps or have a designated location where you can drop them off. Alternatively, vermicomposting can be done indoors (more information is below).
Composting in Your Backyard
Ingredients for Composting
The ingredients for composting include a proper balance of the following materials:
- Carbon-rich materials (“browns”) can include dry leaves, plant stalks, and twigs. The carbon-rich materials provide food for the microorganisms to consume and digest.
- Nitrogen-rich materials (“greens”) include grass clippings and food scraps. The nitrogen-rich materials heat up the pile to create ideal conditions for the material to breakdown.
- Water (moisture).
- Air (oxygen).
What You Can Compost
| What You Can Compost at Home | What to Avoid Composting at Home |
|---|---|
| Nitrogen-Rich Material (“Greens”) | Meat, fish and bones |
| Food and vegetable scraps | Cheese and dairy products |
| Most grass clippings and yard trim | Pet waste and cat litter |
| Coffee grounds and paper filters | Produce stickers |
| Paper tea bags (no staples) | Fats, oils and greases |
| Eggshells (crushed) | Glossy paper |
| Treated or painted wood | |
| Carbon-Rich Materials (“Browns”) | Aggressive weeds/weeds with seeds |
| Dry leaves | Diseased and pest-infested plants |
| Plant stalks and twigs | Compostable food service ware and compostable bags* |
| Shredded paper (non-glossy, not colored) and shredded brown bags | Cooked food (small amounts are fine) |
| Shredded cardboard (no wax coating, tape, or glue) | Herbicide treated plants |
| Untreated wood chips | Dryer lint |
*Backyard composting piles do not generally reach high enough temperatures to fully decompose certified compostable food service ware and bags. These items are designed to be composted at commercial composting facilities.
Steps for Backyard Composting
- Determine how you will collect and store your browns and greens.
Collect and store your fruit and vegetable scraps in a closed container on your kitchen counter, under your sink, or in your fridge or freezer. For browns, set aside an area outside to store your steady supply of leaves, twigs, or other carbon-rich material (to mix with your food scraps). - Set aside space for your compost pile and build or buy a bin.
Choose a space in your yard for your compost pile that is easily accessible year-round and has good drainage. Avoid placing it right up against a fence and ensure there is a water source nearby. Your compost pile will break down in sun or shade. Next, choose a type of bin for your pile. Bins can be constructed from materials such as wire, wood, and cinder blocks. They can also be enclosed and include barrels and tumblers. - Prepare your ingredients for composting.
Before adding your browns and greens to the pile, try to chop and break them up into smaller pieces (e.g., corn cobs, broccoli stalks, and other tough food scraps). Doing so will help the materials in the pile break down faster. - How to build your compost pile.
Start your pile with a four- to six-inch layer of bulky browns such as twigs and wood chips. This layer will absorb extra liquids, elevate your pile and allow air to circulate at the base of the pile. Then layer your greens and browns like lasagna. If needed, add a little water to dampen the pile.Having the right proportions of ingredients in your compost pile will provide the composting microorganisms the carbon, nitrogen, oxygen, and moisture they need to break down the material into finished compost. When adding browns and greens to your pile, add at least two to three times the volume of browns (such as dry leaves) to the volume of greens (such as food scraps). Always ensure your food scraps are covered by four to eight inches of dry leaves or other browns.Air and water are the other key ingredients in your pile. To ensure air circulation, add enough browns and turn your compost occasionally. To maintain moisture in your pile, ensure your combined materials have the consistency of a wrung-out sponge. - Maintain your compost pile.
As the materials in your compost pile begin to decompose, the temperature of the pile will initially begin to rise, especially in the center. A backyard pile, if well maintained, can reach temperatures of 130° to 160° F. High temperatures help reduce the presence of pathogens and weed seeds.
Turning and mixing your pile from time to time will help speed up the decomposition process and aerate the pile. Use a garden fork to turn the outside of the pile inward.
Monitor your pile for moisture, odor, and temperature and make adjustments as needed.- If the pile is too dry, activity in the pile will slow or cease. Moisten the pile and turn it. (Refer to the note above about maintaining moisture in your pile.)
- If the pile has a bad odor, it may be too wet or need more air circulation. Add more browns/dry material to the pile and turn the pile.
- If the pile is not heating up, mix in greens and turn the pile.
- Harvest your finished compost.
When your compost pile is no longer heating up after mixing, and when there are no visible food scraps, allow your pile to cure, or finish, for at least four weeks. You can relocate the oldest compost at the bottom of the pile to a separate area to cure or stop adding materials to your pile. After curing, your pile will have shrunk to about one-third of its original size. Compost in a well-maintained pile will be finished and ready for use in about three to five months. Left untended, a pile may take a year to decompose. The compost will look dark, loose, and crumbly and smell like fresh soil. Most, if not all, of the materials that went into the compost pile should be decomposed.
Screen or sift your finished compost to filter out materials that didn’t break down – twigs, fruit pits, eggshells, and items like produce stickers and plastic. (You can make a homemade screener out of ¼ inch hardware cloth.) Pits, eggshells, etc. that you sifted out can be added back into the active pile or to a new pile.
Avoiding Rodents
Compost piles that are well constructed and maintained properly should not attract pests or rodents.
- If using a bin, it is important to reinforce the bin with a lid and potentially a floor. There should be no holes or gaps in your bin that are larger than ¼ inch.
- Maintain the proper ratio of materials in your pile: two to three parts carbon-rich material (browns) to one part nitrogen-rich material (greens).
- Ensure you cover and bury your food scraps in your pile.
- Do not add meat, dairy, or greasy foods to your pile.
Worm Composting (Vermicomposting)
Worm composting, or vermicomposting, is another method of composting you can do at home. It takes up little space, the materials are simple and inexpensive, and it can be done indoors or outdoors. You will need a container or bin, bedding material, worms, and food scraps. If your worm bin is properly maintained, it should not emit odors or attract pests. The resulting product is vermicompost, a soil amendment.
Steps for Vermicomposting
- Make or buy a worm bin. You can purchase a worm bin or make your own of untreated wood or plastic storage bins. The bin should have a tight-fitting lid and be a dark color to keep out light. If using plastic storage containers, drill air holes around the upper sides of one bin near the lid, and drainage holes on the bottom of the same bin. Place the bin with the drilled holes inside the other bin. (The bottom bin will catch any liquid that drains out of the top bin.)
- Choose a space for your worm bin.
You can keep your worm bin indoors (e.g., under a sink, in a closet or basement) or outdoors in the shade. If your bin is outdoors (e.g., garage, carport, porch, deck, or apartment balcony), insulate the bin with blankets, straw, or other materials to keep it warm during colder months. You want to maintain a bin temperature of 59° to 77° F; however, the worms can survive at 32° to 95° F if they have at least four inches of bedding. - Materials for your bin.
- Worms – Of the 9,000 species of earthworms, only seven are suitable for vermicomposting. One of the most commonly used is the “red wriggler” or Eisenia fetida. It is essential to use a suitable species. Do not use worms you might find outdoors or purchase at a bait shop. Begin your bin with one pound (about 1,000) of worms. Purchase them from a worm grower or find a neighbor in your community who has a vermicomposting bin and can give you some.
- Bedding – Shred or tear non-glossy newspaper, office paper, cardboard, or dry leaves and soak the bedding material for 10 minutes. Wring it out so it feels like a moist sponge. Place it in your bin and fluff it up. Fill the bin almost halfway with the moist bedding and then add a handful of soil.
- Food – You can feed your worms most fruit and vegetables scraps, coffee grounds and paper filters, crushed eggshells, paper tea bags (without staples), and crushed eggshells. Avoid citrus fruits, odorous foods like onions and garlic, meat, dairy products, greasy foods, bones, and pet waste. Chop up scraps into small pieces before adding them to the bin to allow for faster decomposition.
- Start your bin and feed your worms.
Place worms on top of the bedding in the bin. Once the worms have settled in the bin, add some food scraps on the surface of the bedding. Each time you add food scraps, make sure to cover them with two inches of bedding. Adding the proper ratio of materials to the bin and covering them is important. Worms eat about 25 percent of their weight each day. As worms reproduce quickly, you can increase the amount you feed them. Always ensure the food scraps have been eaten before adding more. - Harvest and use your vermicompost.
After three to six months, you will be able to harvest your vermicompost, or worm castings, at the bottom of your worm bin. Vermicompost doesn’t need to cure and can be used immediately or stored for future use.
Benefits of Using Your Finished Compost
You can add compost to your flower and vegetable beds, window boxes, and container gardens; incorporate it into tree beds; mix it with potting soil for indoor plants; or spread it on top of the soil on your lawn.
Compost can be used as a soil amendment or as a mulch. As a soil amendment, mix in two to four inches of compost to the top six to nine inches of your soil. As a mulch, loosen the top two to three inches of soil and add a three-inch layer of compost on the surface, a few inches away from plant stems and tree trunks.
Adding finished compost to your soil :
- Improves the structure and health of your soil by adding organic matter.
- Helps the soil retain moisture and nutrients.
- Attracts beneficial organisms to the soil and reduces the need for pesticides and fertilizers.
- Reduces the potential for soil erosion.
- Sequesters carbon in the soil.
- Builds resiliency to the impacts of climate change.
Source Credit: EPA
Unusual Oregon Cougar Sightings
This Week in Unusual Oregon Cougar Sightings
Big cat sightings continue at Nehalem Bay State Park, and one was spotted for the first time ever on Haystack Rock.

IF YOU WERE planning a hike along Nehalem Bay, perhaps accompanied by one of your favorite podcasts, pets, or small children, now is the time to rethink that plan.
Cougars have been reported in Nehalem Bay State Park since July 13, when the park closed its loop trail. The campground remains open, but the trail is still closed to visitors due to ongoing sightings as of July 18. Meanwhile, just 20 miles north on Cannon Beach, an additional cougar was spotted on Haystack Rock, where it was likely hunting birds. The beach closed on the morning of July 16 and reopened July 17.
“Cougars are pretty elusive, so it’s rare to see one,” says Beth Quillian, communications coordinator for the Oregon Department of Fish and Wildlife northern zone. “This is the first known sighting of a cougar on Haystack Rock.”
Though cougars were nearly eliminated from Oregon in the 1960s by hunting, the cougar population in the state today is healthy, with numbers around 6,000. (Licensed folks can even hunt one cougar per year, up to set regional quotas.) According to the ODFW, cougars are primarily concentrated in the southwest Cascades and northeast Oregon.
Why are they suddenly appearing in the North Coast? The region makes for appealing cougar habitat due to its high populations of deer (cougars’ primary prey), plus elk, small mammals, and birds. Quillian says that many of the cougars we’re seeing in the North Coast are likely expanding into new territories from the densely populated southwest region.
“Cougars have a pretty big range—about 100 miles or so. If it’s getting a little too crowded, some of them are going to start dispersing and looking for new habitat where they can establish their own territory,” Quillian says.
This trend isn’t unique to the North Coast, nor is it new this summer. There were several sightings in June: a cougar on Mount Pisgah in Eugene, and two cougar sightings along mountain bike trails in Sandy Ridge—including a cougar that briefly chased a biker.
In the state of Oregon, there has only been one known fatal cougar attack, which occurred in 2018 near Mount Hood.
The ODFW offers several tips on how to stay safe around cougars. Start by removing things that could attract cougars, like trash and food (including pet food). Even bird feeders could attract cougars by luring birds, one of their types of prey. If camping, store food in animal-proof containers and be sure to cook away from the area you’re sleeping in. There’s safety in numbers, so don’t hike alone, and stay alert by leaving the headphones at home. Off-leash pets can draw a cougar’s attention, so keep your dog on a leash, or at home. Keep kids close to you, and if you’re approached by a cougar, pick up the child without bending over or turning around. Don’t run away from a cougar, since that could trigger a chase response; instead, make loud noises, speak firmly, and make yourself look larger. If you’re attacked, fight back with sticks, rocks, and fists.
Vanport, Oregon – During the early 1940s, Vanport, Oregon was the second largest city in the state. But on a Sunday afternoon in May 1948, it disappeared completely – destroyed by a catastrophic flood.
Chinook salmon retention off Columbia to abruptly close at midnight
- Aug. 22, 2022, 5:40 p.m.

Chinook salmon retention off the mouth of the Columbia River closes at midnight Monday.
Fishing for and keeping hatchery coho salmon can continue, but all chinook salmon must be released unharmed, regardless of hatchery or wild origin.
Oregon, Washington and the National Marine Fisheries Service announced the abrupt closure Monday afternoon.
While there remain uncaught chinook in the pre-approved salmon guidelines, it’s not enough to allow for more days in the season and still have enough remaining to cover incidental mortalities from continued fishing for hatchery coho.
A record number of wild coho salmon returned to the Upper Clackamas this year!
A record number of wild coho salmon returned to the Upper Clackamas this year! Portland General Electric counted 10,000 fish, the highest number recorded at North Fork Dam since its construction and the beginning of counts in 1958.
The early run’s success is largely due to fish passage infrastructure created by PGE, which allows fish to bypass three dams safely and quickly. In particular, a new floating surface collector in North Fork Reservoir, which became operational in 2016, captures more than 90% of ocean-going juvenile fish in the reservoir. This facility is the only surface collection system in the region to bypass fish through a multi-dam complex utilizing a pipeline, without the aid of transport or trucking to a release site.
Oregon Department of Fish & Wildlife: Need to figure out controlled hunts, find a place to clam, learn how to fish or get directions to a wildlife area? We’ve got information on all that and more, straight from ODFW biologists and other accomplished hunters, anglers and wildlife watchers. Great articles!
Two Kentucky Anglers Pull a Massive, 94–Pound Blue Cat Out of the Ohio River
It’s probably safe to assume that Michael Robinson and Terry Raymer will never go to work on March 15 again. The two men from Louisville, Kentucky, have fished on that same date four years in a row now. And according to Kentucky Afield, which shared photos of their recent catch on Facebook, every year they’ve managed to put a catfish weighing more than 80 pounds in the boat. The 94-pound blue cat they landed earlier this week outweighs all those fish, and it just might cement an annual tradition. Read complete story.

Stars Align for 2022 Salmon Runs
Portable Power Primer: A Beginners guide for selecting the best battery option for your field radio kit. They take a look at some portable battery power options for your radio gear.
Oregon Fish Reports
Oregon Fish Reports has been serving Oregon since January 2016. We have river reports, charter boat reports, guide reports and much more. Please browse our resource to find fishing information from the Columbia River down to the Brookings, OR and everything in between.
Visit Oregon Fish Reports
2022 Oregon Whale Watching Season Kicks Off With Orcas Near Brookings
Spring is a fascinating season at the Oregon Coast for many reasons. One of our favorite excuses to visit the ocean is the annual return of migratory whales to our seaside waters. Oregon Whale Watching is always a rewarding adventure.
Some 25,000 individual Gray Whales will be cruising the coastline from March to June, returning to cooler Alaskan waters after birthing their calves in the warm temperatures of Mexico’s Baja Penninsula.
Websites of Interest
Best Road Trips in Oregon & Top Oregon Scenic Drives
Ultimate List of the Most Beautiful Places in Oregon
More Articles Will Be Added Over Time